Getting the Substrate Right Before a Single Tile Goes On

Substrate preparation is where most wall tiling jobs are won or lost, long before anyone sees a finished result. Wollongong homes present a genuine mix of wall substrates, and each one demands a different approach.
Cement sheet is common in wet areas and generally provides a stable, predictable base, though joints and fixings still need proper preparation before tiling. Plasterboard is the substrate that catches people out — in a wet area, it must be confirmed as moisture-resistant board before any tile work begins, since standard plasterboard breaks down behind tiles in showers and laundries over time. Existing tiles can sometimes be tiled over, but only after checking the existing surface for bond strength and flatness; a hollow or uneven base will telegraph straight through to the new layer. Masonry walls — brick or block — need specific primers and adhesives to achieve adequate bond strength, since raw masonry is too porous and inconsistent to trust with standard adhesive alone.
Poor substrate preparation is the leading cause of wall tile failure — cracking, debonding, tiles dropping off walls months after installation. We assess the substrate first, every time, and prepare it properly before layout planning even starts.

Layout Planning — The Difference Between a Considered Wall and a Rushed One
A wall tiling job where the layout has been planned properly looks immediately different to one where the tiler simply started in a corner and cut whatever was left at the end. The difference is visible the moment you walk into the room, and it’s almost entirely down to work done before a single tile was fixed.
We start every wall by establishing true vertical and horizontal datum lines, since real walls in real Wollongong homes are rarely as straight or as square as they look. From there, the layout gets centred across each wall so the cuts at both ends are even and balanced, rather than a full tile on one side and a sliver on the other.
On jobs spanning multiple walls, the layout is planned so grout lines align at internal corners — a small detail that makes a bathroom or kitchen feel finished rather than assembled. Feature tiles, niches, and fixtures like taps, mixers, and shower screens get accounted for in the layout plan from the start, not worked around after the fact.
This is the stage that separates a wall that looks intentional from one that looks like it happened by accident. We treat it as the most important step in the job.

Adhesive Selection and Application — The Technical Side of a Wall That Stays Put
What holds a wall tile in place matters as much as how it’s laid. We select between thin-bed and thick-bed adhesive systems depending on the tile format, substrate, and weight being carried — thin-bed suits most standard tiles, while thick-bed handles larger, heavier formats or surfaces that need more build-up to achieve a flat finish.
Large format wall tiles get back-buttered as standard practice. Back-buttering means applying adhesive to the rear of the tile in addition to the substrate, achieving full coverage behind the tile rather than a few high points of contact. Full coverage matters for bond strength and for preventing hollow spots that can crack under pressure later.
For large format tiles on vertical surfaces, we use non-slip adhesives that grip the tile in position immediately, rather than allowing it to slide down the wall under its own weight before the adhesive sets. Without this, a heavy tile can creep out of alignment in the minutes after it’s fixed, throwing out the entire layout above it.
These details aren’t visible in the finished result, but they’re the reason a wall stays flat and intact years after the job is done.
Where We Tile — Every Wall Environment Across a Wollongong Home
Wall tiling shows up in more parts of a home than people expect, and each environment carries its own requirements.
Bathroom wall tiling is the most common request, and it’s tied directly to wet area waterproofing. Wall tiling in a shower or bath surround gets integrated with the waterproofing membrane underneath, since tiling over a poorly waterproofed wall creates problems that surface months later, not on the day.
Kitchen splashback tiling brings its own detail work — cutting precisely around power points, switches, and appliance outlets so the finish sits clean around every fixture rather than looking patched.
Laundry wall tiling follows similar wet area principles to a bathroom, with attention to substrate and waterproofing where the laundry sits near plumbing.
Feature wall tiling in living spaces and bedrooms uses large format stone-look porcelain or textured tiles to create a single striking wall without tiling the whole room.
Outdoor wall tiling on alfresco areas and outdoor entertainment spaces needs tiles and adhesives suited to weather exposure and temperature movement.
Covering this full range means whatever wall in whatever room, the same standard of substrate preparation, layout planning, and adhesive selection applies.
Feature Walls — The Highest-Impact Move in a Renovation
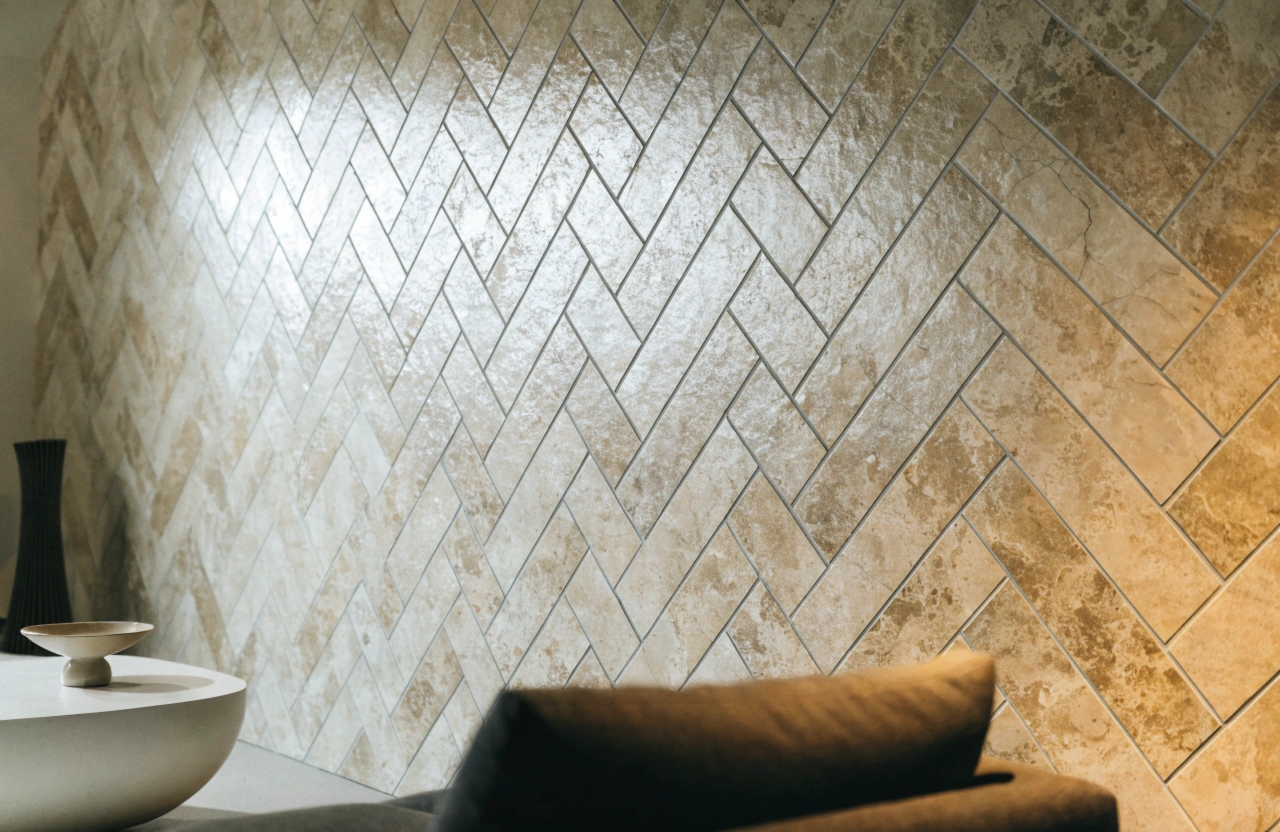
A well-executed feature wall is one of the highest-impact design moves available in a bathroom or living space renovation. A single wall in a contrasting tile format, texture, or laying pattern — herringbone, stack bond, or chevron — changes the entire feel of a room without the cost or disruption of tiling every surface.
The difference between a feature wall that elevates a room and one that fights it usually comes down to planning. A herringbone pattern needs precise setting out from the first tile to stay straight and consistent across the wall. A chevron pattern depends on accurate cutting at every join to keep the pattern crisp rather than uneven. Stack bond looks deceptively simple but shows every imperfection in a substrate that isn’t dead flat.
We work with clients on feature wall layouts that complement the rest of the room’s design rather than competing with it — considering scale, tile direction, and how the feature wall reads alongside the surrounding tiling or paint finishes.
Why Wollongong Homeowners Choose Us for Wall Tiling
Wall tiling is one of those jobs where the gap between an average result and a genuinely good one is almost entirely down to the people doing it. A few things set our approach apart on every wall tiling job across Wollongong and the Illawarra.
We bring experience tiling walls across every substrate type and tile format found in local homes — cement sheet, plasterboard, existing tiles, and masonry, paired with standard, large, and feature format tiles.
Layout planning and cutting are treated as precise work, not a rough estimate corrected as we go. Wet area compliance is built into bathroom and laundry wall tiling wherever waterproofing is involved, rather than treated as a separate afterthought.
The result across every job is a wall that’s flat, straight, and consistently jointed from top to bottom — the kind of finish that still looks sharp years after the last tile went in.
Wall Tiling Wollongong — Frequently Asked Questions
Yes. Wall tiling deals with vertical surfaces that are unforgiving of substrate inconsistency, and adhesive needs to hold tile weight against gravity rather than simply supporting it from below. Layout planning also plays a larger role in how the finished wall reads once complete.
Sometimes, depending on the bond strength and flatness of the existing surface. We assess the current tiling first, since a hollow or uneven base underneath usually needs addressing properly before any new layer of tiles goes over the top.
Yes. Bathroom wall tiling in wet areas gets integrated with the waterproofing membrane underneath, since the membrane and the tiling work as one system. Getting this sequence right is what keeps a shower or bath surround compliant and leak-free long term.
Back-buttering applies adhesive to the rear of the tile as well as the substrate, achieving full coverage behind the tile rather than a few points of contact. This full coverage supports the tile’s weight properly and reduces hollow spots that can crack later.
Yes. We plan feature wall layouts — herringbone, stack bond, or chevron — so the wall complements the rest of the room’s design. Pattern setting out and precise cutting are what keep these layouts looking sharp rather than uneven.
Yes. Splashback tiling is cut precisely around power points, switches, and appliance outlets, so the finished surface sits clean around every fixture rather than looking patched together or roughly worked around afterwards.
Get a Free Measure and Quote for Wall Tiling in Wollongong
Quality wall tiling is one of the most visible investments in any renovation. It’s the surface you stand in front of every day, the backdrop to a bathroom, kitchen, or living space, and it deserves a tiler who gets the layout right before the first tile goes up.
We tile walls across Wollongong and the Illawarra — Thirroul, Corrimal, Bulli, Woonona, Fairy Meadow, and surrounding suburbs — covering bathrooms, kitchens, laundries, feature walls, and outdoor entertainment areas. Every job starts with proper substrate assessment and layout planning, and finishes with a wall that’s flat, straight, and consistently jointed from top to bottom.
If you’ve got a wall tiling job in mind, whether it’s a full bathroom retile, a kitchen splashback, or a feature wall you’ve been picturing for a while, get in touch for a free measure and quote.
Call 0240036408 or fill in the contact form below to book your free wall tiling quote.